Post by Jimmu on Apr 17, 2006 20:19:55 GMT 11
I thought I would take some photos of the process for fitting the top mount intercooler.
Thanks to Witchdoctor for sourcing it for me
1. The Standard Engine Bay except for a Snorkle and a 760CCA 160RC Battery
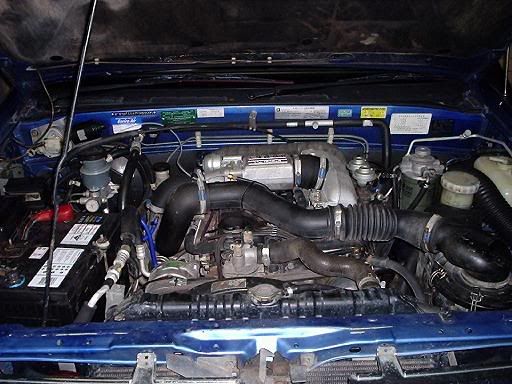
2. Pulling off the piping and the EGR setup
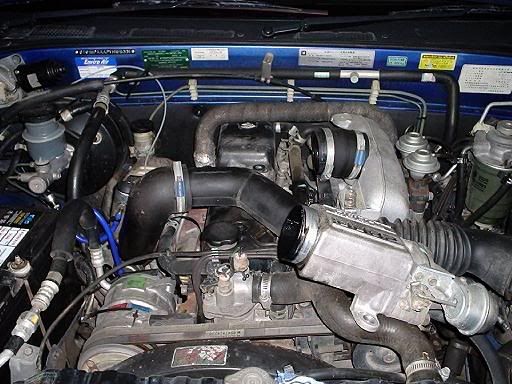
This took about 15 minutes to remove the standard intake setup which the top mount replaces as well as all the connecting lines.
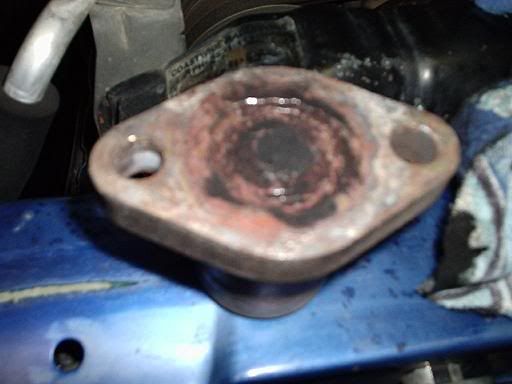
3. EGR removal. This was neccesary to fit the cooler.
I removed the EGR setup completely and blocked the hole in the intake manifold with one of the alloy pieces from the setup. I was going to make up some plates like Witchdoctor did, but I got lazy and hell the peice fitted and is light anyway.
I went to weld up the steel peice that bolts to the exhaust manifold and someone else had already done it... Not real clean but it is solid.
4. Rotating the Compressor Housing on the Turbo
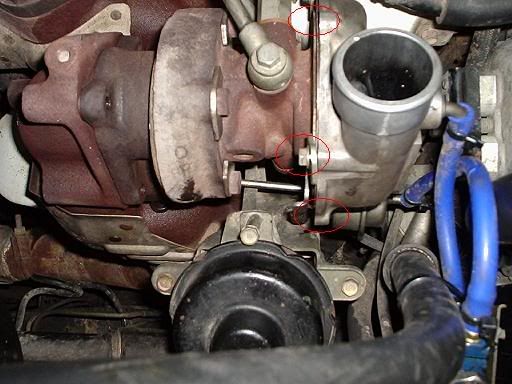
There are some bolts holding brackets that clamp the housing to the body. These were loosened and in the case of the bolts holding the actuator bracket removed and refitted.
This was a pain in the arse as you can see by my questions in another thread. Thankfully Yarno who has already done it was there to keep me on track. I was about to pull the turbo off.
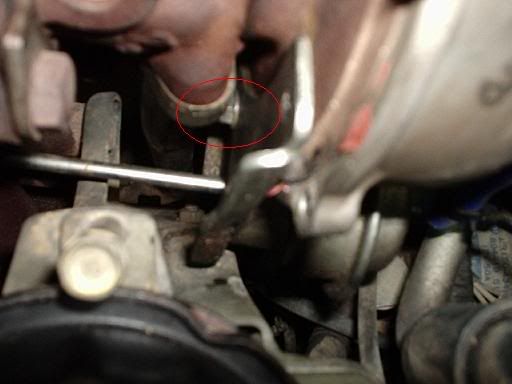
The nut in red circle was almost impossible to get to. I had to remove the warm up thingy and forceably rotate the bracket holding the waste gate acutator to get access to it.
5. Fitting the Cooler in Place (Making Room)
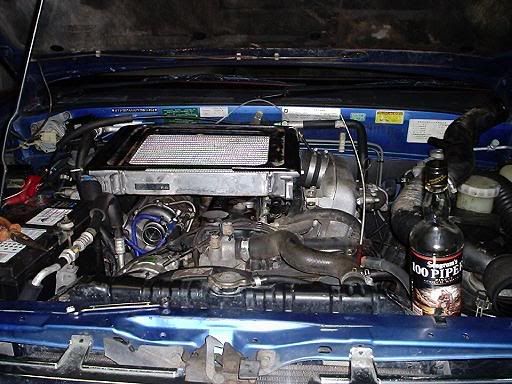
It actually fits quite nicely. The only real issue was the air-conditioning line (currently not connected) which I might have to relocate.
And the breather line that is too short and needs to be extended.
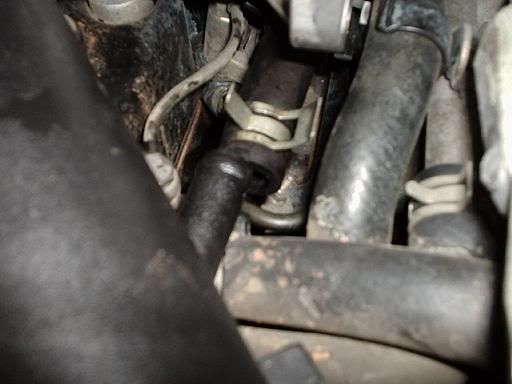
6. Modifying the end tanks to take a boost line for gauge and fuel pump boost compensator
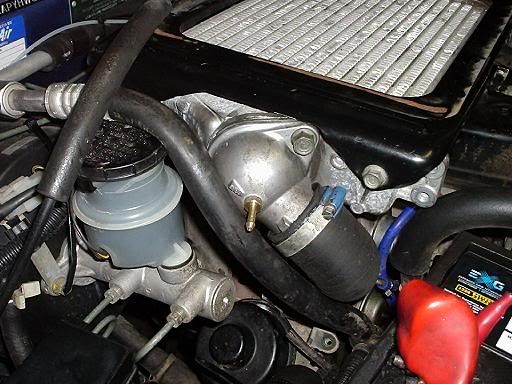
This core must have came off an ECU model as there was no boost line out from the intercooler. As it replaced the old intake section which had the line out I drilled and tapped a thread into the end tank and fitted a barb thing to take a line. I was going to do it on the other side of the cooler but this section was the thickest and I thought it was better not to risk it.
7. All fitted up
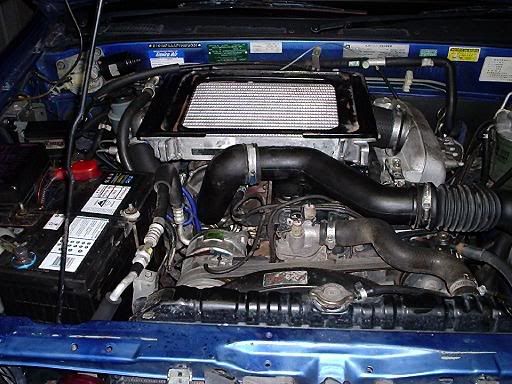
All up about 6 hours work. Could have done it in about 3 if I had known what I was doing.
I have not mounted the cooler to anything solid as yet. Just the rubber piping connecting it makes it super solid but I will have a play with it next weekend and see.
To Do: Fit a fan underneath (It looks like it will fit) or on top and likely a water spray also.
Now get the bonnet cut and start playing with boost / fuel combinations
Jimmy
Thanks to Witchdoctor for sourcing it for me

1. The Standard Engine Bay except for a Snorkle and a 760CCA 160RC Battery

2. Pulling off the piping and the EGR setup

This took about 15 minutes to remove the standard intake setup which the top mount replaces as well as all the connecting lines.
3. EGR removal. This was neccesary to fit the cooler.
I removed the EGR setup completely and blocked the hole in the intake manifold with one of the alloy pieces from the setup. I was going to make up some plates like Witchdoctor did, but I got lazy and hell the peice fitted and is light anyway.
I went to weld up the steel peice that bolts to the exhaust manifold and someone else had already done it... Not real clean but it is solid.

4. Rotating the Compressor Housing on the Turbo

There are some bolts holding brackets that clamp the housing to the body. These were loosened and in the case of the bolts holding the actuator bracket removed and refitted.
This was a pain in the arse as you can see by my questions in another thread. Thankfully Yarno who has already done it was there to keep me on track. I was about to pull the turbo off.

The nut in red circle was almost impossible to get to. I had to remove the warm up thingy and forceably rotate the bracket holding the waste gate acutator to get access to it.
5. Fitting the Cooler in Place (Making Room)

It actually fits quite nicely. The only real issue was the air-conditioning line (currently not connected) which I might have to relocate.
And the breather line that is too short and needs to be extended.

6. Modifying the end tanks to take a boost line for gauge and fuel pump boost compensator

This core must have came off an ECU model as there was no boost line out from the intercooler. As it replaced the old intake section which had the line out I drilled and tapped a thread into the end tank and fitted a barb thing to take a line. I was going to do it on the other side of the cooler but this section was the thickest and I thought it was better not to risk it.
7. All fitted up

All up about 6 hours work. Could have done it in about 3 if I had known what I was doing.
I have not mounted the cooler to anything solid as yet. Just the rubber piping connecting it makes it super solid but I will have a play with it next weekend and see.
To Do: Fit a fan underneath (It looks like it will fit) or on top and likely a water spray also.
Now get the bonnet cut and start playing with boost / fuel combinations

Jimmy


