3vilc
Isuzu Baby
 Bighorn Gone :( MU purchase coming soon
Posts: 40
|
Post by 3vilc on Aug 15, 2005 21:15:56 GMT 11
Hi all,
I am thinking about doing a body lift on my 94 Bighorn.
Has anybody done this or can anyone tell me exactly whats involved and how easy it is to do? Is there any easy fix for moving the bumpers up and how much hoses and wiring need to be lengthend?
Any idea on a price for the blocks do they need to be special blocks or can I just get some alloy or plastic cut to size and then drill the holes in it myself?
What sort of heights are possibly with this method?
From what I have read it seems like a better method for me as I am only mainly after the staunch look of a higher truck and dont need 1000s of $ of suspension components. Particularly with a lotus model im assuming would be even harder to find lift parts for
THanks in advance,
Clive
|
|
HiMuZuLux
Isuzu Junior
IFS: A great reason to own a 9" angle grinder :)
Posts: 125
|
Post by HiMuZuLux on Aug 19, 2005 9:02:20 GMT 11
Don't use any old stuff on the truck when you do a body lift - either use machined aluminium blocks or machined UHMWPE.
Your safety, and the safety of those in the truck and around it in an accident ride on how you do a body lift. Its critical to use the right materials.
If you just use some old plastic, then in an impact the blocks will probably shear apart and you could find the body and chassis part company in a rather dramatic and lethal way. You will also find the insurance company just laugh when you ask for some money (assuming you live to ask).
Use high tensile bolts and nylock nuts, and the correct material, then notify your insurance company you've done it so it can be noted against your policy, then point it out to the WOF guy so he can check it... but be prepared to have to get the vehicle certified, as many WOF guys will freak out at that sort of modification.
Better off to do the suspension where you can go 50-60mm over factory with no cert needed.
My 2c
Steve
PS: I can supply the blocks and bolts if you tell me the sizes you need. I regularly fit these to Hiluxes, so have a good collection of 60mm dia, 50mm high UHMWPE blocks and M10 Grade 8.8 bolts and Nylocks.
|
|
|
|
Post by Diesel28 on Aug 19, 2005 11:58:28 GMT 11
Hi steve,have posted on the trip forum and seen this one now .I would be very keen but i dont know any of the sizes.Would it be possible to pop over and see u sometime over the weekend and discuss.
Regards
Neil
PS:my email is diesel74@xtra.co.nz
|
|
HiMuZuLux
Isuzu Junior
IFS: A great reason to own a 9" angle grinder :)
Posts: 125
|
Post by HiMuZuLux on Aug 22, 2005 12:31:54 GMT 11
Hi Neil, sorry I only just got this. Tuesday or during the coming wekend would be fine if that suits - I'll drop you a line with directions to my workshop, failing that give me a call/txt on 021 637 600
Cheers
Steve
|
|
|
|
Post by isuzumudman on Aug 22, 2006 21:08:04 GMT 11
I have done 2 lifts on my 95 Bighorn. Suspension & body. There are several things to be aware of on a body lift but nothing is serious. You can do it yourself, I did. I used machined aluminium blocks 50h X 50diam with 11mm holes. The 50mm diameter maybe should have been 60mm. The LWB Bighorn has 12 body mounting points and the SWB has 10. Mountings 4, 5 & 6 from the front bolt up into an inaccessable nut in the body so use bolts with the same threads. My old bolts were of varying lengths but I got away with 150mm for all of them.
I used a portapower to slowly lift from the front down each side and packed up as I went.
Insert the aluminium blocks as soon as you can and put the bolts in finger loose. This will minimise body/chassis movement. The front bolts will probably have to go upwards instead of down.
The radiator is attached to the body. Remove the fan and fan shroud before you start. You may need to shave the fan blades a bit if you don't lengthen the radiator bottom mounts by 50mm to drop the radiator a similar amount. The bottom hose only just fits on mine as I haven't dropped the radiator yet. There is a vacuum tube which sits between the altenator & A/C compressor which I needed to lengthen as It parted company. I removed the steering column but then found there was just enough play to leave it as it was. Mine is auto so I had to wind out the gear change linkage a bit. The 4wd lever now sits 50mm south but thats ok.
All up cost?? Haven't ever figured it out but the cost of hiring a portapower, 12x150x10 high tensile bolts, 12x50x50 aluminium spacers, a bit of vacuum hose and a weekend of free labour. $200.00 all up??
Best of luck.
|
|
InVinceble
Isuzu Junior
....still says ISUZU on the motor!
Posts: 77
|
Post by InVinceble on Sept 8, 2006 22:41:44 GMT 11
Tonight I started a 50mm body lift on by "Horizon" (Bighorn in disguise) - following a similar plan to Isuzumudman. Used UHMWPE instead of alu. My gearbox is out at the moment so can't check the fan /shroud gap yet, or the gearlever heights. One thing not mentioned is to check the rear bumper fixings to the body on the sides, in the area of the mudflaps, could end up with sloping bumper (happen to me? narh!) Oh and definately check thread type before trying to put coarse M10's into fine M10 captive nuts!!!! Next is to make spacers to lift the fuel tank - anyone done this?
|
|
|
|
Post by geeves on Sept 9, 2006 16:33:25 GMT 11
Sounds like your realy getting stuck in. I took a few pics today of a real Honda 4wd at a 4wd rally in Wellington. It was doing quite well. Ill send you a copy once the films developed.
Actualy it was a old Civic body on Suzuki 413 chassis and unknown v6 under the hood.
|
|
InVinceble
Isuzu Junior
....still says ISUZU on the motor!
Posts: 77
|
Post by InVinceble on Sept 9, 2006 18:12:42 GMT 11
Sounds intriguing Geeves.
Back to the lift...
Had to replace the (9.5mm?) hose from the vacuum pump with something an extra 50mm longer. On this subject, what is that black metal box that the other end of the hose goes to?
Also changed the fuel hose to the fuel filter as that was tight too.
Also spent several hours replacing all the 4mm vacuum hoses (most had perished making loose connections) and re-routing them to make life easier.
I've removed the quick warm up device from the exhaust too. That saved a metre of hose!
I've worked out what "spacers" I need for lifting the fuel tank. Get them made on Monday.
....and as a complete aside, I fitted a 12" fan above my intercooler and will put the shroud over the top of that (again more brackets to make on Monday). Oh, the joy of 2" lifts!!!
|
|
|
|
Post by geeves on Sept 9, 2006 20:49:52 GMT 11
If its what I think it is its just an auxillary vacume resivoir. Not all 3.1 bighorns have it but with the low output from the vaccum its a good idea. Are we talking about a rectangular box with a rounded top just in front of the brake servo. There are 2 pipes one goes to the pump the other to the servo
|
|
InVinceble
Isuzu Junior
....still says ISUZU on the motor!
Posts: 77
|
Post by InVinceble on Sept 10, 2006 8:10:29 GMT 11
Yep, that's it. I've replaced the hose feeding it but didn't notice any others. I'll go have another look!
|
|
|
|
Post by JustinW on Sept 11, 2006 15:38:55 GMT 11
Can you describe the tank spacers. Thats the next job on my Wizard. I've been running a 40mm body lift for about three years now. You have to be careful with lifts over 40mm as the steering column sliding joint can come apart. My lift took about an hour and a half one night after work using a couple of jacks. Remember to use high tensile bolts. I'm used steel blocks.
|
|
InVinceble
Isuzu Junior
....still says ISUZU on the motor!
Posts: 77
|
Post by InVinceble on Sept 11, 2006 21:19:42 GMT 11
Tank spacers - the intention is to use the existing hangers and put spacer blocks between them and the tank. The RHS (viewed from rear) of the tank sits on it's hanger while the LHS bolts up under the hanger. I'm hoping that with a bit of twisting and turning I can get both sides over the hangers. The spacers will than have to be slightly different in height (5mm-ish) to accommodate the difference. I'm using alu blocks 170 x 19mm with three 9mm holes at 75mm centres. I'll fit new high tensile bolts using the existing captive nuts on the RHS and new Nylocks on the LHS. My steering column sliding joint "looks" ok but will obviously check when the truck finally gets of it's ramps. Definately use HT bolts, and remember that they are 1.25 thread! Steel blocks  I held a steel equivalent in one hand with my UHMWPE in the other - you probably use an extra 5L per 100km lugging that lot around ;D |
|
|
|
Post by Harry on Sept 11, 2006 21:20:11 GMT 11
Justin, I did a 50 mm body lift on my Bighorn and raised the tank using 50 x 25 mm rhs.On the Bighorn the tank sits on the bracket on one side and hangs from it on the other.I couldn't get the tank to go ovver the top on both sides so cut one bracket off then bolted it back on once the tank was in.I've since found that when the diff is out the tank can slide onto the brackets from the front.
Regards,Harry.
|
|
|
|
Post by Harry on Sept 11, 2006 21:29:44 GMT 11
Oops that other post wasn't there when I did mine.There was no way I could get the tank to sit on the brackets on both sides without taking one bracket off.I didn't think of taking the diff out at the time.The tank guard will need it's brackets modifying to get it to fit unless you leave it at the original height.Which kind of wrecks any advantage gained from raising the tank.I haven't finished the guard yet so have 2 large dings in the tank to show for it .
Harry.
|
|
InVinceble
Isuzu Junior
....still says ISUZU on the motor!
Posts: 77
|
Post by InVinceble on Sept 11, 2006 22:10:07 GMT 11
Ha!  just had a look at the tank fit, and damn, Harry you're right. I'll cut the bracket off too! Thinking of making a entirely new bracket for the LHS, don't see the point of putting in a spacer too. My guard had been pushed up into the tank too, threw it on the lawn, jumped inside it and hey presto - fixed! ;D Thinking of running a couple of stiffeners in the bottom of the guard before fitting up, that and modding the bracketry to maximise ground clearance.  |
|
|
|
Post by JustinW on Sept 12, 2006 12:10:12 GMT 11
When I first thought about the tank lift I thought I would be able to just slip some spacers in. I'll have to have a better look. As for the take guard I was going to unstitch the brackets and weld them back on higher up. The alternative was to build a heavy duty aluminium tank guard as the factory one is a bit light and ended up dented within a week of being straightened. I straightened it the same was as InVinceble, put it on the lawn and jumped on it. As for steel blocks being heavy, the blocks are the least of my worries, it's all the gear I carry for track clearing that adds hundreds of kgs to the brute..
|
|
|
|
Post by Harry on Sept 12, 2006 22:48:30 GMT 11
I unstitched the brackets and bolted them on higher up but it looks as though some of the guard around the edges of the bracket needs to be removed.
Regards,Harry.
|
|
|
|
Post by Harry on Sept 12, 2006 22:51:34 GMT 11
Before you start trying to shift the tank around, drain the fuel out first.It makes life a lot simpler.
Harry.
|
|
InVinceble
Isuzu Junior
....still says ISUZU on the motor!
Posts: 77
|
Post by InVinceble on Sept 16, 2006 19:59:57 GMT 11
Thanks for the last tip Harry, but borrowed one of those jacks which has a pair of parallel rails (I don't know if there's a technical name for it). The tank sat nice and level on it. Anyways, I ended up using a spacer on the RHS hanger and unstitching the LHS and welding it back on higher for the tank. The guard had both brackets unstitched. The RHS was rewelded to the guard lower, while the LHS got shortened and welded to the tank bracket/chassis rail. The LHS of the guard got two bolts welded into it and the bottom of the brackets have been slotted to allow fitting up to them. Oh, and a chunk of the guard was removed on the RHS to enable it to fit over the tank bracket. I've decided that a new guard/skid plate will be custom made to suit, after the rear bumper gets replaced (this weeks project). As for the body lift..... I've a 5 sp manual and found I couldn't get 2nd gear. So, the main shifter got a small "cut-bend-weld" and the corner of the collar which holds the rubber seal had a few mm removed with the grinder. Back to 5 gears again! The 4wd shifter is low but no bother. I took the fan shroud off, bottom does foul with fan, no choice really as previous owner had the whole arrangement held on with cable ties. No problem with hose lengths. Done a few short trips on the road, feels fine - thought it may roll more, but it doesn't seem to. Will give a more thorough test in the forest tomorrow - the Land Rover Club are visiting our "patch", could be interesting! |
|
InVinceble
Isuzu Junior
....still says ISUZU on the motor!
Posts: 77
|
Post by InVinceble on Sept 17, 2006 18:37:51 GMT 11
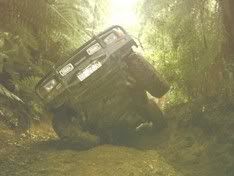
Hmmm - 2" helped at the front but my tank may need to go higher me thinks!
A couple of holes found my rear end dragging - timely, the holes had been "improved" by 2 passes of the Land Rover club. By the way, a trial biker we helped out reckoned that they should be the 95% Toyota club from what he saw earlier in the day.
Suspension lift is "on order" so will wait until after that for teh final verdict.
Went for a river dip afterwards, saves on powerwashing time and is a laugh in it's own right, and 2' of body lift is of advantage there!
|
|


 I held a steel equivalent in one hand with my UHMWPE in the other - you probably use an extra 5L per 100km lugging that lot around ;D
 just had a look at the tank fit, and damn, Harry you're right. I'll cut the bracket off too! Thinking of making a entirely new bracket for the LHS, don't see the point of putting in a spacer too.